One of the most satisfying projects I’ve worked on was a workshop I built at my previous house. If you’re setting out to build a workshop, a shed or a small barn I hope this serious of blog posts will help you out a little.
I built the workshop because I didn’t have a garage, and I wanted a place to work on carpentry projects and my motorcycle. I also didn’t like the sheds that could be purchased at the local big box home improvement stores. They somehow seemed cheap in terms of materials and construction.
This project turned into much more than just a workshop. In a sense it became test of my ability to build something real, something lasting.
I recommend doing a project like this yourself, or offering to help someone else with theirs. Alternatively, you could gain similar skills and experience volunteering for Habitat for Humanity.
This was my most ambitious project to date, and before I started I did a lot of reading about construction of outbuildings, framing, roofing and even timber framing.
After I read and read and read I started putting a design together in a 2D drawing tool called xfig. Since then, I’ve switched to using google sketchup for my designs for it’s ease of use and because visualizing a design in 3D is much nicer.
During the project I constantly solicited advice from friends and family who have done similar projects in the past. I got the most advice from [bugged constantly] my step dad, Don G, who also built his own garage. His garage was given the nickname “Garage-mahal” by his neighbors :). You know you’re doing something right when you get “Garage-mahal” over “Garage-zilla” :).
Note about safety, codes and working with your permitting agency:
If you take on projects like this be sure to understand the building codes and permit requirements in your area. Some people grumble about getting permits and the inspection process but I’ve found the people who work for my city to be quite helpful. When I’ve worked with them they realize I’m an amateur trying to get things right and do safe and quality work. With the right attitude you get advice from people who know all the rules, you get your permits and throughout the process your work gets inspected and you learn a lot!
With all that said, this workshop project didn’t require a permit – but it was required to meet certain size and height limitations.
Don and I work well together because we have a similar philosophy about building things. That philosophy boils down to: if its worth building, its worth over building ;). Put another way, build things right and build them to last.
On to the workshop…
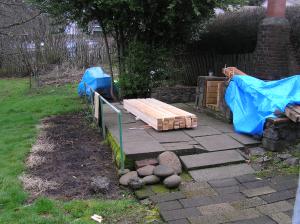
The site for the work shop was the spot where another shed had been. Don and I tore down the old shed leaving only the concrete foundation blocks and the good parts of the original floor (reuse you know!).
The following pictures are presented in roughly the order they were taken when building the workshop.
Here is a stack of 2x4s I bought for framing.
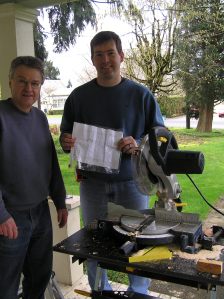
This is Don and I with a copy of the workshop plans.
Your can download the plans here (pdf format). I don’t claim these plans are perfect or that they can be used in all situations. If you are inexperienced, be sure to understand your local codes, read some of the available construction literature and talk to your friends who know what they are doing.
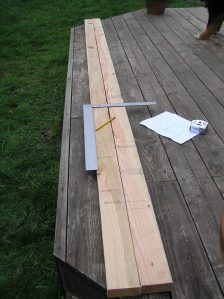
I used the framing square to mark off stud position on 16in centers. One of the nice things about the framing square is that it is 1.5in wide – the same width as my studs!
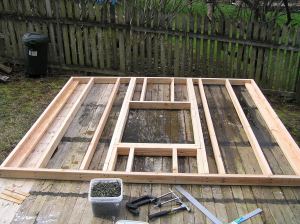
This is the first wall assembled on the floor of the workshop. Each stud is nailed to a top and bottom plate. Notice on each end of the wall there is a stud turned 90 degrees from the others. This creates a corner that provides more surface area for attaching the next wall and also interior wall covering – ex. drywall. Also notice the window’s header assembly with the plywood sandwiched in the middle. The thing to remember with headers is the dimension of the lumber must be appropriate for the opening. In my windows 2x4s were perfectly fine – but in larger openings a larger sizes of lumber must be used!
Now we’ve raised the wall until it’s plumb , braced it and then screwed to the floor.
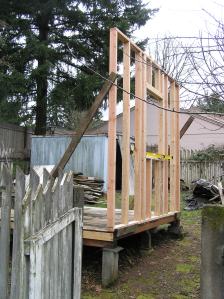
Another wall raised, attached to the first wall and the floor.
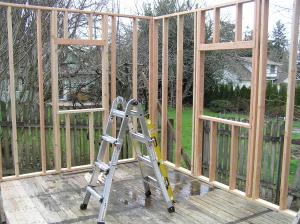
Here Don and I are assembling another wall and window opening.
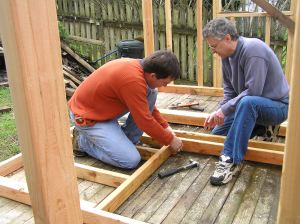
Its always good to let the kids hang out when its safe. They’re gonna soak up the experience and remember it forever. My kids are definitely NOT going to be afraid of using power tools or tackling projects like this :)
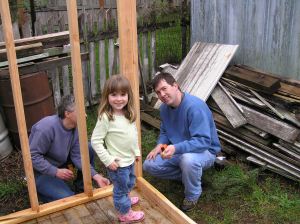
Here we are raising the final wall.The walls are are pretty light when you use kiln dried wood. But since I was building an outbuilding I chose green douglas fir which was heavier to lift – because its still very wet.
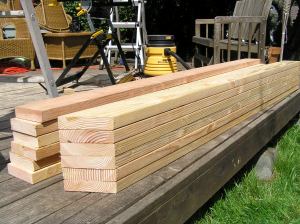
Ok, now we’re moving on to the roof. This is a picture of the 2×6 lumber I used for the rafters and rafter ties. 2x6s were over kill, but I wanted a super strong roof with big 2ft overhangs all the way around. The 2×6 boards on the right have the tops cut at the correct angle so that when they’re joined the roof will have the desired pitch.
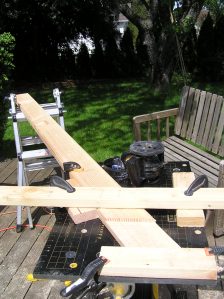
This pic shows how I setup the rafter so that I could cut a scarf joint (or lap joint) with my router. I picked a scarf joint because I thought it would allow the strongest joint and also because of the way some of the roof load would be distributed to the opposing rafter. I got this idea from timber framing literature where it’s called a half lapped rafter peak.
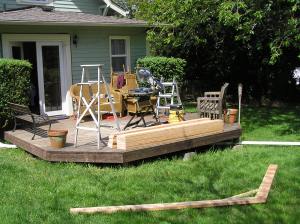
Here you can see one of the rafter assemblies on the ground. I assembled them all on the ground, then walked them over and lifted them up on top of the walls. This was an easy way to build the all the rafter assemblies so they were pretty much identical.
In this assembly the two rafters are connected with a collar tie (more on this later). Collar ties and rafter ties are VERY important because they prevent the weight of the roof from pushing the walls out.
Here I am with one of the rafter assemblies up on top of the walls.
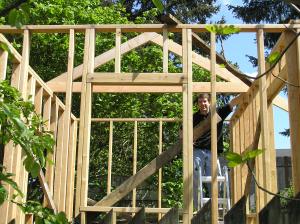
Here are the two rafter assemblies for the roof area above the doorway. I used collar ties here to provide extra head room for taking long things in and out of the shop.
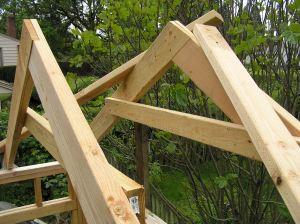
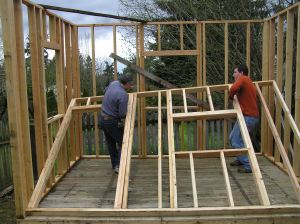
Here’s a full shot of the completed frame sans diagonal braces.
Note the metal connectors I use to connect the rafter assemblies to the walls. These are simpson strongtie connectors. These connectors are to prevent the wind from blowing the roof off.
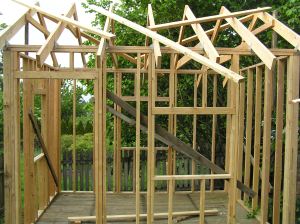
Here’s a I’m showing the diagonal braces notched into the walls to improve racking strength.
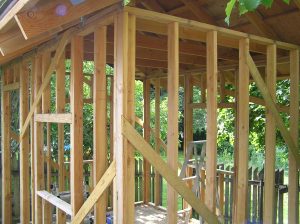
In a future post I’ll share some of the books I read and some pictures of the roof and completed workshop.
Sweet! Great write-up.. I got to experienc eit all over again. Never knew the detail about the roof joists – very interesting.
By: TOM on October 28, 2009
at 10:25 pm
Hey Tom – thanks for checking out the post. It was always nice coming into work and chatting with you and Ken about the project :)
By: andy idsinga on October 29, 2009
at 9:47 am
Hi Andy,
Still waitng for part 2!
Regards,
Mick
By: Mick Jammal on July 20, 2011
at 7:29 pm
Hi Mick ..yeah, about that :) .. problem is i need to go back to my old house/property and ask the current owner if I can take a bunch of pics of the shop. Shes a super nice lady, but i just havent had the time to get over there :(
By: andy idsinga on July 21, 2011
at 10:21 am
along these lines though ..ill soon have a post all about the playhouse im building for my kids.
By: andy idsinga on July 21, 2011
at 10:23 am