Our DIY kitchen remodel project goes on and on and on.
In this post I’ll share the work we did to get the new heated floor and tile in! Working slow was especially true for me here because repairing errors once the heated floor is mortared over its is a truly a hassle!
(note: in my previous post I covered demolition of the old floor and patching a furnace vent hole.)
If you’re thinking about DIY remodeling project – anticipate working very slowly as most projects, despite our best intentions, end up only getting attention on the weekends.
If you don’t have practice with a particular type of project you’ll end up working slowly to get nicer results. Let me repeat that – working slower will help you achieve nicer results :).
You should also break down the project into small enough chunks so that you can consult how-to books and websites and possibly fix errors when they are small. Let me repeat that – fix errors when they are small :).
Don’t let the prospect of a long DIY project scare you away. Doing it yourself might save you a lot of money but it will help you build valuable skills and a real sense of accomplishment!
Before you start – I encourage you to get the required permits for your work. An electrical permit is almost certainly required. Don’t listen to people discourage you from getting a permit with the old “government bureaucracy”, “not needed for your own house” blah blah blah.
I’ve found that the city development services agency and inspectors where I live (Portland, OR) are very easy to work with, helpful and timely in their service. I’ve found our inspectors to be quite appreciative of my being a DIYer who wants to do things right and helpful in making sure my work is correct.
Okay, for our project we bought two SunTouch floor warming mats. I enjoyed working with the SunTouch mats. It was straight forward, the instruction manual was easy to follow and installation DVD was pretty good. SunTouch has a page for DIYers here which provides you the benefit of looking through the installation manuals before you invest resources in your project.
After demolition and patching, I bought 3×5′ 1/4″ thick sheets of hardy backer board. The backer board provides an excellent surface for for attaching tile using thin-set mortar.
I used a utility knife to cut the backer board to fit using the “score and snap” method – which avoid tons of nasty dust. I then used #8 1 5/8″ screws to secure it to the floor.
Next, I arranged the suntouch heating mats in front of the main work areas in the kitchen and attached to the floor according to the suntouch manual.
Its very important at this point, and throughout the project to follow the instructions in the manual for measuring the mat resistance with a digital multimeter. When you measure the resistance you’re really just checking to see if you’ve accidentally broken any of the heating wires or the temperature sensor. Its critical that this be done regularly so that you can fix the problem as soon as possible in the project and potentially avoid having a unusable (and potentially unsafe) heating mat in your floor.
Here’s a picture of the floor with the backer board and heating mats installed.
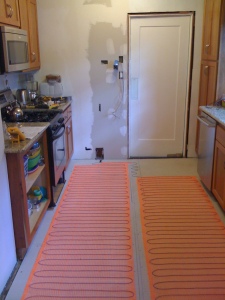
For the electrical – I ran some new 12/2 romex wire from a dedicated 15amp breaker in my main electrical box. Since my mats only draw 2.5 amp each the 15amp was just fine for the project. In the future, when I add a in floor heating to our bathroom, I’ll connect the new mat’s electrical to this same 15amp circuit!
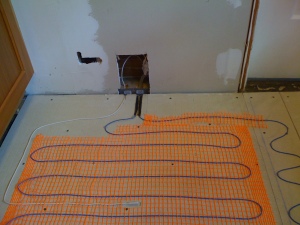
This picture shows how the wires are run from the floor mats and temperature sensor into the bottom of the wall. Note the small metal nail guards.
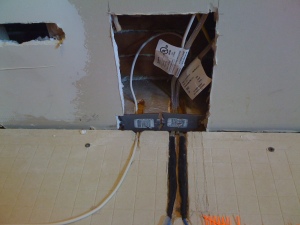
Here is a picture of the electrical near the floor after I fed the mat wires through a flexible metal conduit
Originally I fed the wires to the thermostat box (above) without conduit – but when I had the electrical work inspected I was told that in Oregon we’re required to use conduit. My inspector kindly described what kind of conduit was needed and roughly how to do it.
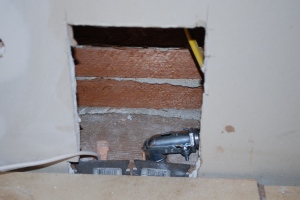
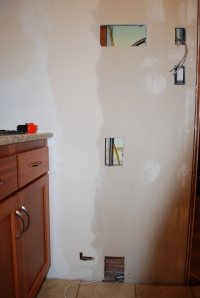
This picture shows the holes in the wall – which I used to feed the wire and conduit up to the thermostat box.
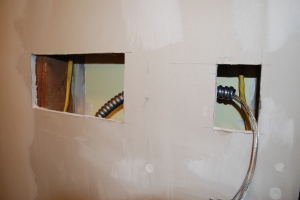
Here is a closeup of the wiring and conduit to the thermostat box.
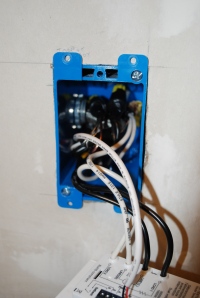
This is a pic of the thermostat box taken as I was making the wire connections. Note that the conduit in the box is secured with a conduit nipple and a nut so that the conduit won’t accidentally detach from the box.
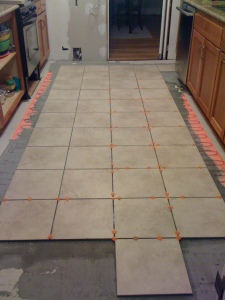
Here is a picture of the first set of tiles we laid down. Note liberal use of 1/4″ tile spacers.
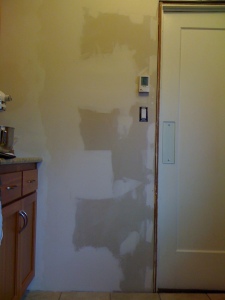
All the electrical holes are now patched up – with three layers of drywall mud (aka joint compound). I’ll need at least one more layer of mud before I’m ready to prime.
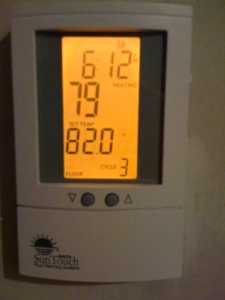
Finally – the thermostat has been installed (and turned on) ..note the “heating” indicator …anticipation was really building in our house at this point :) The suntouch thermostat has several “programmable heating cycles” that allow you to control the temperature for a given time of day. This is pretty cool because you can program it to have the floor nice and warm before you have to work in the kitchen.
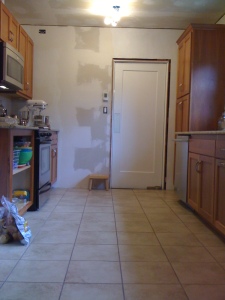
…and here is a picture of the finished (and grouted) floor! …yes yes the kitchen is still a work in progress but now when we wake up in the morning the kitchen floor is nice and toasty warm on the feet!
